Using the local history
In this section, you will use the local history feature to switch to a previously saved version of an individual
Java element.
-
Open junit.samples/VectorTest.java file in the Java editor and select the method
testCapacity() in the Outline view.
-
Change the content of the method so that the 'for' statements reads as:
for (int i= 0; i < 99; i++)
Save the file by pressing Ctrl+S.
-
In the Outline view, select the method
testCapacity(), and from its context menu, select Replace
With > Element from Local History.
-
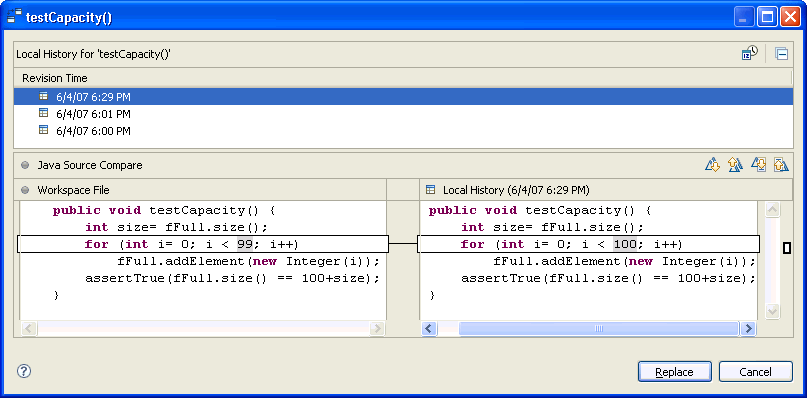
In the Replace Java Element from Local History dialog, the Local History list
shows the various saved states of the method. The Java Source Compare pane shows details of the
differences between the selected history resource and the existing workbench resource.

-
In the top pane, select the previous version, and click the Replace
button. In the Java editor, the method is replaced with the selected history version.
-
Save the file.
-
Beside replacing a method's version with a previous one you can also restore Java elements that were
deleted. Again, select the method testCapacity() in the Outline view, and from its context
menu, select Delete. Confirm the resulting dialog with Yes and
save the file.
-
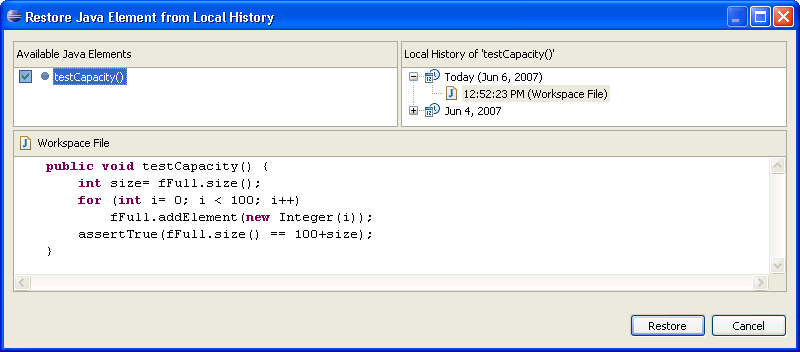
Now select the type VectorTest in the Outline view, and from its context menu, select
Restore from Local History.... Select and check the method testCapacity()
in the Available Java Elements pane. As before, the Local History pane shows the versions saved
in the local history.

-
In the Local History pane, select the earlier working version and then click Restore.

Java editor

Using the local history


