 Export wizard.
Files can be exported from the Workbench either by:
Export wizard.The operating system's file system explorer can be used to export a copy of a folder or file from the Workbench to the file system.
Open the operating system's file system explorer.
Drag the file JanesFile.txt from one of the navigation view to the file system explorer.
Depending on where you are dragging to, you may need to hold down the Ctrl or Shift key while dragging to ensure the file is copied. Look for a small plus sign on the drag cursor to know whether the file is being copied or moved.
The export can also be achieved by selecting the file in the Project Explorer and choosing Edit > Copy, then
pasting it in the file system explorer.
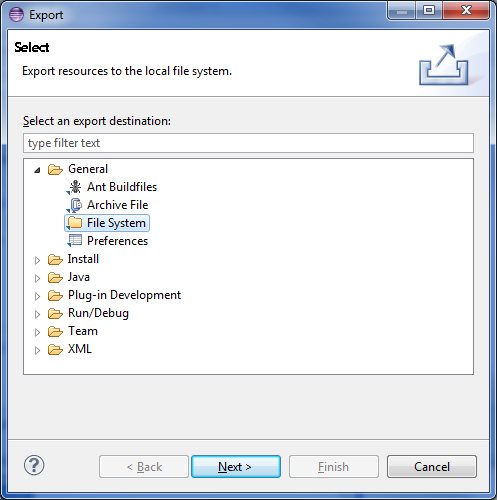
The Export wizard can be used to export from the Workbench to the file system.
Select the project JaneQUser in the navigation view.
From the popup menu, select Export.
In the Export wizard, select File system, then click Next.
Expand JaneQUser project, and click on JanesFolder. In the right pane ensure that only JanesINIFile.ini is selected. Notice the folder and project in the left pane now have a grayed checkbox indicating that some, but not all, of their contents will be exported.
The Filter Types button can be used to filter the types of resources to export.
Note: To export JanesINIFile.ini only, simply select it in the navigation view and choose File > Export. The Export wizard will automatically ensure it is the only file selected for export.

In the To directory field, type or browse to select a location in the file system for the exported resources to reside.
If the name of a directory that does not exist is entered the Export wizard will offer to create it once Finish is selected.
In the Options area, options are given to:
Click Finish when done.